Pompoms for Preschoolers

Here is a really simple and fun learning activity for preschoolers.  It doesn’t take much to set up or to clean up at the end.
Materials

  • Pompoms in a variety of colours and sizes
  • Muffin tin
  • Large tweezers (I got mine from a board game called Avalanche, which is also a really fun game for preschoolers)

What to do

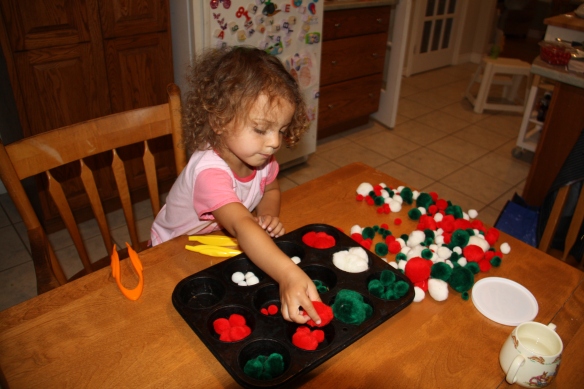
Dump the pompoms out and have your preschooler sort them into different cavities in your muffin tin based on colour and/or size.  Show them how to pick up the pompoms using the tweezers.  This way they are developing fine motor skills AND pre-math skills (see what I did there?).  This is one of those activities that I showed to my daughter once, then left the bag of pompoms in her toy bin.  Now she brings them out to me and asks to set up the muffin tin for her.

This is what happens when her hands get tired:


Decorative Key Holder

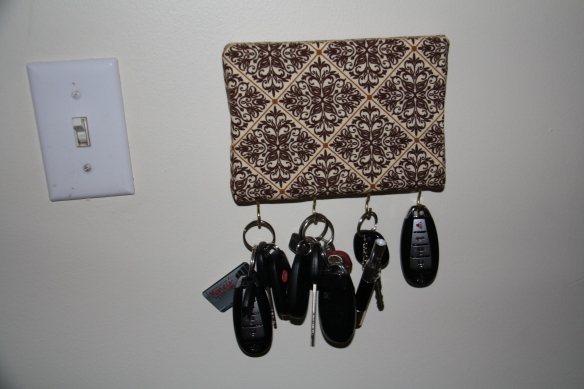
We had a key holder in our last house, but it was screwed into the wall, so was left as part of the purchaser’s agreement.  So, I had been without a key holder for almost two years.  I didn’t loose my keys THAT often because I carved out a little space on the top shelf of the closet, but it definitely wasn’t as convenient as a key holder.  Luckily, I joined Pinterest, and found a great idea for an easy, inexpensive and unique key holder.  It was one of those Pinterest posts that didn’t actually link to anything, so I’m going to do a short tutorial here.

Materials

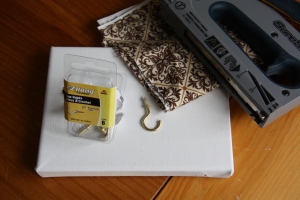
  • 7″x5″ art canvas
  • small screw in hooks
  • cotton fabric
  • staple gun
  • two large head nails
  • hammer

Instructions

  1. Cut the fabric into a rectangle about 3″ wider and 3″ higher than your art canvas
  2. Centre the fabric on the canvas, flip the canvas over and fold the extra fabric to the back of your canvas.
  3. Use a staple gun to secure the fabric to the canvas.
  4. Screw in 4 small hooks to the bottom of your canvas.  The wood used to make the canvas should be soft enough to allow you to do this by hand.
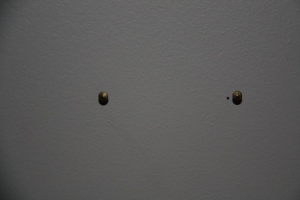
  5. Hammer the two nails into the wall  wide enough apart to support the two top corners of the canvas.  As you can see, they were a little too close together on my first try 😉
  6. Hang your new key holder, and enjoy always* know where your keys are.

*well, almost always

Star Mobile

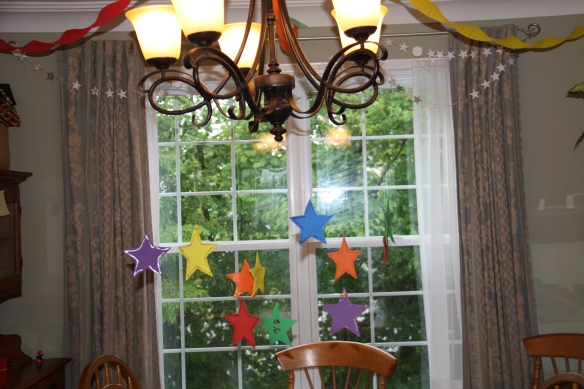
As I mentioned in my cocktail umbrella wreath post, we had a rainbow themed party for my son.  One of the decorations that we did for the dining room, was to spice up our light fixture with a star mobile.  This is basically the same craft that I did in my Butterfly Mobile tutorial, but I made it a little more pro this time because it wasn’t just a whim.

Here’s what I used:

  • Craft foam in various colours
  • scissors
  • elmer’s glitter glue
  • crayola glitter glue
  • vinyl thread
  • needle

I cut out craft foam stars in 6 different colours and had my kids decorate them using glitter glue.  I then used clear vinyl thread to attach them to the light fixture.  I used a needle to get the thread through the foam and tied a double knot so the thread wouldn’t pull all the way through.  I then tied the other end to the light fixture.  This gave the illusion that the stars were just hanging in mid air, which definitely impressed the 5 and under crowd 🙂

Rainbow Birthday Cake


*Note:  I started this post back in June, but then decided to take the summer off, so I will now finish this post and will start posting more regularly again.

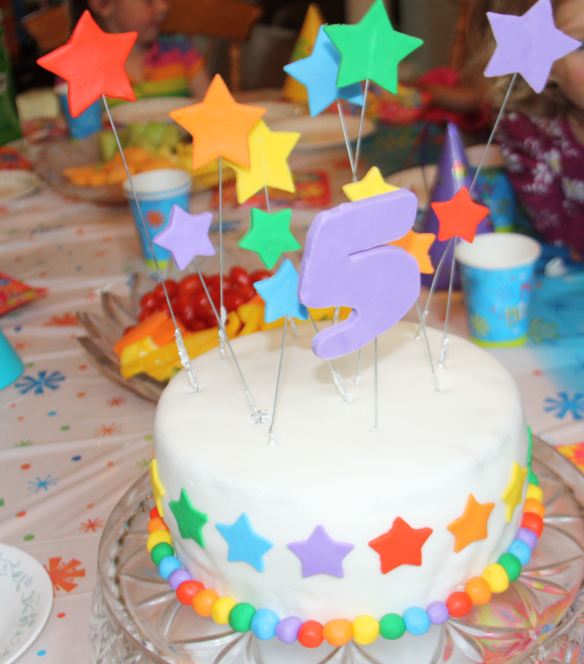
I really wish I had a better picture of this cake, but we were so busy with all the birthday party preps that I really didn’t get a chance to do too much photography!  I didn’t know how the stars on top were going to hold up, so I just added them a few minutes before the party started (I literally put the last one in moments before the first guest arrived).  As it turns out I could have easily done them first thing in the morning and they would have been just fine.
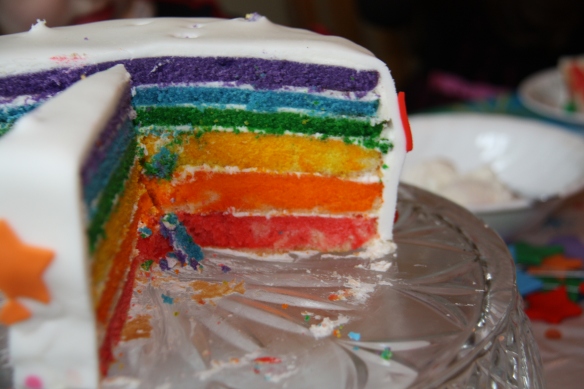
This is the inside of our beautiful rainbow cake.

I also didn’t take any photos of the process, so I don’t have a great tutorial, but I will share my recipes and a few tips I learned along the way.

I’m fairly new to fondant covered cakes (this one is my third), and I found out the hard way that not all cakes are a good choice for covering with fondant.  My first one ended up being a little saggy around the middle… So, when I went to make my second one, I looked for a more dense cake.  I was doing a lady bug cake for my daughter, so I also needed something that was going to hold up as a dome and could possibly be sculpted.  I turned to google and came up with this recipe:  http://allrecipes.com/recipe/whipping-cream-pound-cake-2/

Not only is it sturdy and forgiving to work with, it is also delicious!

I didn’t really think out my plan before I dove into making this cake.  I knew that I had three round 8″ pans, so I knew I would have to do two rounds to make the 6 coloured layers that I wanted.  I mixed up the cake recipe (just a single recipe, which proved to be a mistake) and greased and floured my three pans.  With the idea to save myself a few dirty dishes, I decided to pour half the batter evenly between my three pans and then colour the batter once they were in the pans (mistake #2).  The problem is that once the batter was in the pans I realized I couldn’t really mix very well because I didn’t want to mess up my grease/flouring job…  These were my red, orange and yellow cakes.  As you can see from the picture they actually turned out alright, but I still wouldn’t recommend this method.  Too stressful!  So for my next three cakes I poured the remaining half of my batter evenly into three bowls.  I then added the blue green and purple colouring.  This is where I started to run out of batter.  No matter how good you are with a spatula,  you’re going to leave some batter in the bowls and some on the spatula.  This is why my top three layers are considerably more thin than my bottom three.  Oh well, none of the five year olds at the party complained 😉

I baked the cakes three at a time for about 10 minutes (first batch a little longer, second batch a little shorter).  I let them cool in the pans for 10 minutes before turning them out onto my wire cooling rack.  I let the pans cool completely before re-greasing and flouring for round two.

I’m not going to go through all the details of assembling and decorating the cake.  There are tons of other tutorials that are great and have lots of pictures or good videos.

I will say that I wasn’t sure how well the fondant stars and the fondant 5 would hold up, but they did just fine.  I rolled the fondant quite thick for cutting those shapes.  I then inserted florist’s wire into each of the cutouts.  I let them harden over night and then inserted them into the cake.  I wrapped the ends in aluminum foil, as the wire I used wasn’t food grade and I didn’t know if it had some coating on it that might leach into my cake.

All in all I was very pleased with how the cake turned out.  Danny helped me with every stage (including decorating) and we had a really great time with this project.

Cocktail Umbrella Birthday Wreath

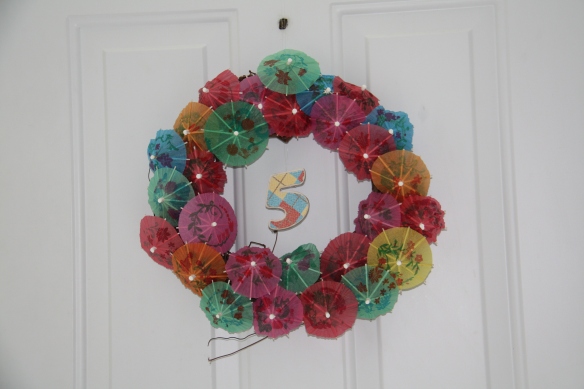
My son’s fifth birthday is a little over a week away (and his birthday party  a little under a week away…), so we have been busily crafting up decoration and party favours.  My next few posts are all going to be party related, although most of the ideas aren’t really exclusive to birthdays.  This wreath, for example, is not birthday related unless you add the age in the middle as I have done.

My son’s preschool invited students from the local university to come and do a segment on colour theory.  My son loved the activities and was really taken with colours and colour mixing.  When it came time to decide on a birthday cake, he chose one that was very colourful and rainbowesque, without being rainbow girly.  I decided to have a rainbow colour themed birthday, but not have the rainbows.  Instead I’ve mostly stuck to stars and shooting stars in rainbow colours.  With that in mind, I browsed Pinterest for rainbow wreaths and came up with quite a few really nice ones.  My son then got to pick his favorite, and he picked the cocktail umbrella on from Family Chic.  It may be a little too girly for some boys’/men’s taste, but whatever.

Here’s what I used for mine:

  • a 10″ grapevine wreath
  • two packs of parasol picks (aka cocktail umbrellas)
  • fishing line
  • nylon thread
  • printed 5 on cardstock

Here’s how I made it:

  1. open up the parasols and stick them into the wreath.  Yes, it’s that simple.  I used 28 to cover my wreath.  I didn’t do anything to secure them in place.  The picks go all the way through the wreath and stick out the other side, so I was worried that when I put the wreath against the door, they would all get pushed out.  Luckily they don’t, so I didn’t have to do anything to keep them in place.
  2. I thread a piece of fishing line through the metal hoop that came on the wreath to hand the wreath on the door.  I thought of doing a fancy ribbon, but since it’s for a boy’s birthday I decided a big fancy bow wasn’t quite right.
  3. I then printed off a number 5 onto card stock.  I let Danny choose from all my digital scrapbooking kits and he liked the plaid 5 from the Primary Grunge kit by A Work in Progress.  I cut out the five and used a needle to thread a piece of nylon thread through the card stock.  I then tied the other end of the thread through one of the vines, and voilà, a 5 that is magically hanging in the middle of the wreath.

Cute Hand Print Penguin

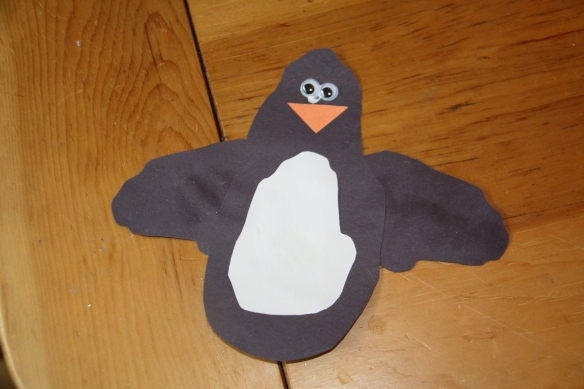
Hand Print Penguin CraftI got this idea from a recent Kindermusik class.  I thought it was too cute to pass up.  I did this craft with my 2 year old, and it was a really good fit for her skill.

What you need:

  • 1 piece black construction paper
  • 1 piece white construction paper
  • scrap of orange construction paper
  • glue stick
  • tacky glue
  • 2 googly eyes
  • pencil
  • scissors

How to make it:

  1. Place your hand with fingers closed on the piece of black construction paper.  Trace around your hand with a pencil. Cut along your pencil line.  This will be the body for the penguin.
  2. Place your child’s hand with fingers closed on the piece of black construction paper.  Trace around his/her hand with a pencil.  Cut along your pencil line.  Repeat this step to make two wings for your penguin.
  3. Trace your child’s closed hand on the white construction paper and cut out.  This will be the penguin’s tummy.
  4. Cut out an orange triangle for the beak.
  5. Using the glue stick, glue the wings, tummy and beak in place.  I let my daughter go wild with the glue stick, and then helped her place the parts to make it look like a penguin.
  6. Use the tacky glue to add the eyes.  I put down the dabs of glue and let Anna place the eyes.

We went a step further to turn this into a Father’s Day card.  We glued the penguin to a blue piece of construction paper that had been folded in half.  We added “Happy Father’s Day” and my daughter added some doodles to turn it into a Father’s Day card.

Chinese Paper Lanterns

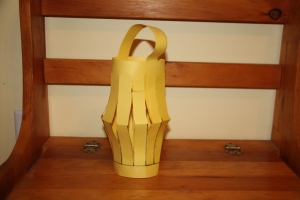
Chinese paper lanterns are a really great craft for cutting, measuring and ruler practice.  I think my son got the idea from the Treehouse website, but I’m not 100% sure.  I just know that he came and asked me if we could make paper lanterns after playing some games on treehouse.com.  I didn’t know exactly what he was talking about, so I googled something about paper lanterns and found this site.

What you need:

  • construction paper
  • marker
  • ruler
  • scissors
  • scotch tape

How we made them:

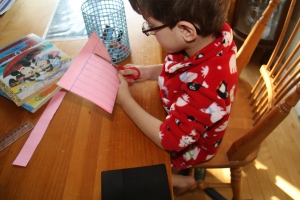
  1. Cut a 1 ” strip from a long side of your piece of construction paper.  This will be used for the handle.
  2. Fold your paper in half, long sides together.
  3. Draw a line about 1.5 inches from the long sides that you have just folded together.
  4. Draw lines about 1 inch apart from the folded edge of the paper down to the line that you drew in step 3 (see picture above for visual).
  5. Cut along the vertical lines that you just drew being sure to stop at the line drawn in step 3.
  6. Unfold your paper.*
  7. Tape the two short ends together and tape the handle to the top.

*At this point, for a more finished look, you can refold the paper the other way so that the marker lines are on the inside.


Bubble Snakes

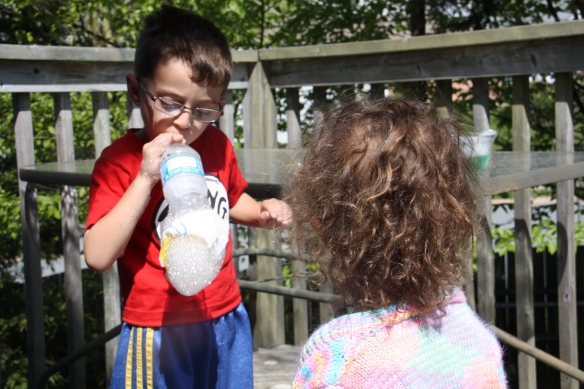
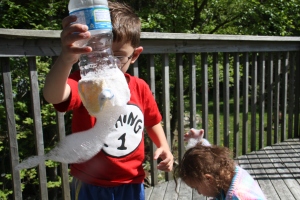
I finally joined Pinterest a few weeks ago, and kinda went nuts looking through stuff and getting new ideas for crafts, cooking and kids activities.  I had been putting off joining because I thought that when I joined, I was going to waste huge amounts of time browsing.  I have been pleasantly surprised to find that I can browse very quickly and re-pin things and then when I want to do an activity, I have a whole bunch of ideas to choose from.  I actually has been a time saver, because now I have one resource to go to when searching for new activities.  Anyways, all this to say that I found this idea through another idea that a friend had posted on Pinterest.  It’s again from the Juggling With Kids blog (that’s where I found the Fireworks in a vase idea).

What you need:

  • plastic bottle
  • old face cloth
  • dish soap
  • elastic band

How you do it:

  1. Cut out the bottom of your plastic bottle.
  2. Cut your old face cloth into a circle big enough to cover the bottom of your bottle and to go part way up the side.
  3. Secure face cloth to the bottle with your elastic band.
  4. Fill a medium sized bowl with water and add a squirt of dish soap.
  5. Blow into the top of the bottle.

NOTE:  I think we added too much soap!  We couldn’t get really long snakes and it took a whole bunch of air to get medium snakes.

This was a fun activity, but much messier than regular bubbles.  We’ll probably stick to regular bubbles to keep so much soap off our yard, hair, clothes etc.!

Button Snakes

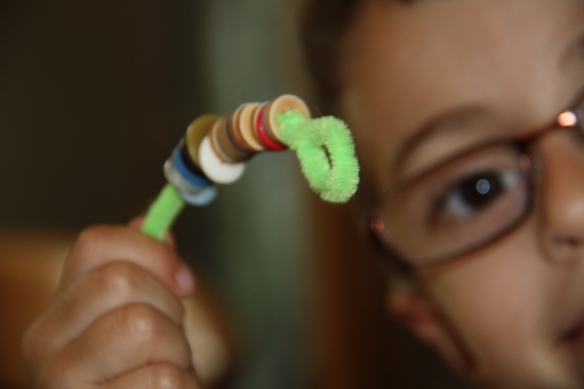
button-pipe cleaner snakes

The site that I got this from used this as a craft, but we used it just as an activity.  I had a big jar of buttons that I had left over from a craft that I did years ago (really cute button leg Santa decorations),  so when I saw this activity on Pinterest, I knew I already had everything we needed.  My two year old couldn’t do this yet, but it has kept my 4 year old occupied for quite a while.  There’s really not much in the way of instructions.  I just looped around the end of the pipe cleaner to keep the first button from sliding off.  Then I jut let him string on as many buttons as he wanted.  A fun fine motor skills activity that easy to set up and easy to put away!

Coat Hanger for Kids

We’ve been living in our house for almost two years now and there are still tons of things I want to do to make it more livable.  When we first moved in, we thought we would only be here for two years.  That meant that it wasn’t worth doing a lot of customizing.  However, we found out in April that we would be staying here for at least another year, most likely another three years, and possibly as long as five years.  I felt that that was enough to make it worth my while to start customizing.

There are a ton of things that I love about our house, but the front entry way is not one of them.  When you first walk in our door you see the stairs up to our top floor.  Immediately to the right and left are doors into other rooms.  Our front closet is just a little further down on the right in the hallway that leads to our kitchen.

This doesn’t leave a ton of room for storage of all our “front hall stuff”.  Ideally, I would love to have a mud room, but that’s just not going to happen in this house.  One small thing that I realized I could do, was to make a small kids storage area.  I waited to find a nice set of hooks on sale, then had my husband install them in the hallway that leads to our kitchen.  This small set of hooks is at just the right height for little kiddos to put away their own stuff!  The fun part is that they actually like taking care of their own things now that they can actually reach them.   I was a little worried that the hall was too narrow, and that we were always going to be bumping into the coats and back packs.  Luckily that has not happened and it doesn’t obstruct traffic flow at all.  Now I just need a good idea for storing mitts, hats etc in the winter.  Any suggestions?