Army of Goodness – more or less

I love to bake and I much prefer to feed my kids homemade snacks than anything store bought and stuffed with preservatives, so I’m always on the look out for muffin and cookie recipes that have redeeming ingredients like oatmeal, wheat germ, fruits and veggies.  This recipe is one that I pulled from a Canadian Living magazine about 10 years ago and has been a staple in my household ever since.  It has several redeeming ingredients including whole wheat flour, oatmeal, banana and berries.  I call them my “left-over” muffins because I vary the yogourt flavour and fruit depending on what I have left over in my fridge and freezer.   I used to always make full sized muffins, but I find with kids its great to have mini muffins on hand.  Often they will eat 2 or 3, which is the equivalent of a full sized muffin, but for the rest of the time is saves half the muffing going straight into the compost bucket.

Canadian Living has a good website with a ton of great recipes, but I haven’t found this one on-line, so I will provide it here.

Blueberry Oatmeal Muffins

  • 3/4 cup packed dark brown sugar
  • 3/4 cup french vanilla yogourt
  • 1/2 cup mashed banana
  • 1/4 cup oil
  • 1 egg
  • 3/4 cup quick-cooking rolled oats
  • 1 cup all-purpose flour
  • 3/4 cup whole wheat flour
  • 2 tsp baking powder
  • 2 tsp cinnamon
  • 1/2 tsp baking soda
  • 1/4 tsp salt
  • 3/4 cup blueberries
  1. in bowl, whisk together sugar, yogourt, banana, oil and egg; stir in rolled oats.  Let stand for 10 minutes
  2. In large bowl, whisk together dry ingredients.  Pour yogourt mixture overtop; sprinkle with blueberries and stir just until dry ingredients are moistened.
  3. Spoon into paper-lined muffin cups.
  4. Bake in centre of 375°F oven until tops are firm to touch, 20-25 minutes for full-sized muffins, 15-18 for mini-muffins.
  5. Remove from pan; let cool on rack.

Splatter Paintings

My 4 year old son loves the show Artzooka! on kids CBC, so we often try to do the crafts featured on the show.  Some of them require specialized materials or are geared for older kids, but we have had a lot of fun with many of the Arzooka! crafts.  One that we saw a few weeks ago was particularly suited to my son, as he had always raved about similar activities that he did at preschool.  I don’t find the Arzooka! website easy to navigate, so I haven’t linked to their instruction page for this.  I did a quick look and couldn’t find it, so it may not even be there.  Here’s how we did our splatter paintings:

Equipment:

  • small bottles of paint (we used of acrylic paint that we had left over from a previous small bottles of paintproject)
  • paper (we used 8-1/2 X 14 printer paper)
  • markers
  1. If you’re doing this with small children I would recommend folding your paper first.  That way the crease is already down the centre and your kids can “fold it” on their own after they’ve done their splattering.  I hadn’t pre-folded the first one, so once Danny had finished adding the paint he folded it on his own, but it wasn’t anywhere near the middle, so his painting didn’t really turn out.

2. Let your kid go wild with the paint bottles.  Simply squeeze paint out in crazy designs all over the paper.  It’s definitely more fun if you have more colours.  I was really surprised how many paintings we were able to do with just a few small bottles of paint.

3. Fold your paper in half and press down to smoosh the paint into a neat design.

4.  Unfold and admire your beautiful artwork!  Have fun deciding what each one looks like.

5.  Let your artwork dry. (We left them overnight)

6.  Get our your markers and add details like facial features or additional scenery to turn your abstract splatterings into actual pictures.  Here’s one that Danny turned into a bunny.  It’s really fun to see their imaginations go wild 🙂

I’ve only shown a few pieces here, but we’ve done this activity 4 times now and have produced over 20 pictures, all with 5 leftover bottles of acrylic paint.  One caution:  acrylic paint is NOT washable, so make sure that you have your painting bibs on!

Touch of Colour in Corel Paint Shop Pro X3

When I first started doing digital scrapbooking, I didn’t want to make an investment in software because I didn’t know if it was something I was going to do a lot of.  My husband found me a free program called Paint.net.  It is a neat little program that is basically built by the users.  I could do all the basic stuff, but it didn’t have any really fancy tools.  Things like adding a drop shadow would take 6 or 7 clicks whereas in a bought program you do it in two clicks.  After a year or so of using Paint.net, I decided that digital scrapbooking was something that I really enjoyed and was going to continue as a hobby.  Most digital scrapbookers at the time were using Adobe products (this was before the big boom of software specific for digital scrapbooking), but I decided to go with the equivalent product from Corel, as Corel is a Canadian company.  I figured I would be able to muddle my way through as I had with Paint.net.  I have managed, but I almost always have to “translate” adobe tutorials into paint shop language on my own.  I have decided to post paint shop tutorials here in case there is anyone else out there doing digital scrapbooking in paint shop 🙂

The first tutorial I have decided to do, is adding a touch of colour to a black and white photo.  I love this effect, but I find it only works on very select photos.  I don’t end up using it often, so I can never remember how to do it!  There are lots of tutorials for Adobe on how to do this, but I think at least half of them are not great ways.  Some of the tutorials basically put a black and white copy above a colour copy of the photo.  You then erase what you want in colour from the black and white copy.  The problem is, that if you erase just a smidge too much, the only way to correct is your undo button.  The way I’m going to show you gives you the option of re-painting to black and white.

So here goes:

  1. Open your photo and Save As so that you don’t accidentally lose your original photo. 
  2. Make sure your Layers Pallet is open.  To open your layers pallet, go to View -> Pallets -> Layers. opening layers palletYour layers pallet looks like this:layers pallet
  3. In your layers pallet, Right click on the background image and select Duplicate.duplicate background image
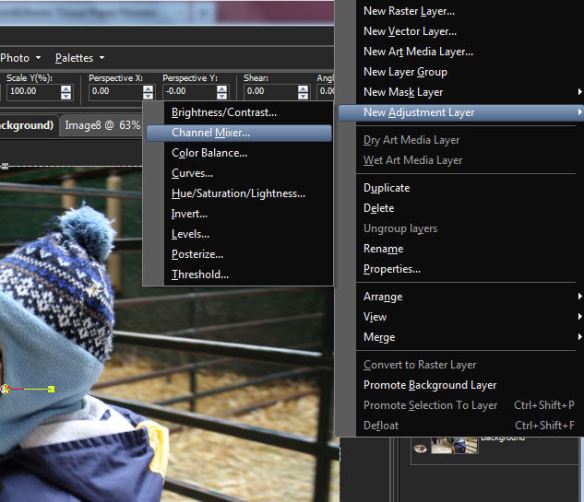
  4. Still working in your layers pallet, right click on the layer labelled “copy of background” and select New Adjustment Layer -> Channel Mixer.channel mixer adjustment layer
  5. In the Channel Mixer Box, select the Monochrome Box. This will change your layer to black and white.select monochrome
  6. In your layers pallet, right click on your new layer called Channel Mixer 1.  Select Merge -> Merge Down.merge adjustment layer
  7. In your layers pallet, right click on the layer called copy of background.  Select New Mask Layer -> Show All.show mask layer
  8. Make sure that black is selected as your foreground colour and white is selected as your background colour.  The easiest way to do this is to have your Materials Pallet open (refer to step 2 on how to open pallets) and select the “set to black and white” button.set to black and white
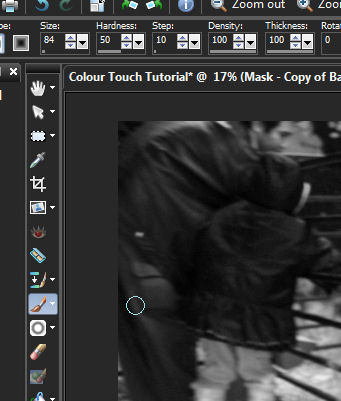
  9. Making sure that your Mask layer is selected in your layers pallet, choose your paint brush tool.paint brush tool
  10. Now you can start to paint.  Anything that you paint using a black paint brush will reveal the colour from the original image.  Anything that you paint using a white paint brush will change back to black and white.  Here is my finished product:
  11. This is how I put it into a layout using The Scrappy Kat’s kit Totally Flakey:

Child’s Reversibile Apron

If you have little sous-chefs in your kitchen, little aprons are a must!  I had a little apron that we got from a Kindermusik course which served my son very well.

Kindermusk Apron

However, my daughter now wants to help too, so I needed a second little apron.  I liked the fit of the Kindermusik apron, so I decided to use it as a template to make my new apron.  It had two pockets on the front that my kids didn’t use, so I decided to go pocket-less for my version.  I traced the outline of the original apron onto do-sew to make my pattern piece, but if you want to try this here are the measurements that I cut (i.e. including seam allowance):

  • width of bib: 8″ at the top, curve out gently to the full width of the skirt.
  • length of bib:8″
  • width of skirt: 17″
  • total length: 20″
  • width of ties:3″
  • length of ties: ~20″  the lengths varied because I cut them however I could to use the least amount of fabric.

This apron is really easy to make and is great for beginner sewers.  Here’s a quick tutorial on how to put it together.

1.  cut out two apron pieces.  I cut both pieces from the same fabric, but I think choosing two different fabrics would be cuter.  That way your little one basically gets two new aprons!

2. cut out four ties.

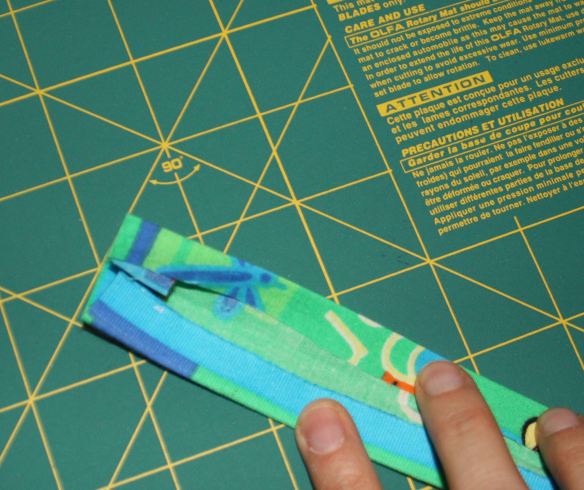
3.  Fold the ties in half lengthwise.  Press.  Fold each of the unfinished sides in towards that middle crease.  This is what you should end up with: Fold and press 4 ties4.  Fold up 3/8″ of one end of the tie and press inwards.  This is just so that the end of your tie doesn’t have any unfinished edges when you’re done.Fold down end of tie

5.  Sew open edge of ties shut using only 1/8″ seam allowance. 

6.  Sew all four ties onto one of your apron pieces as per pictures.

Waist tie placement

Neck tie placement

  I sewed back and forth a few times to make sure that the tie was going to be securely anchored.

7.  Place remaining apron piece right side down on your first piece and pin in place.  You are now going to sew all the way around the outside of your two pieces, leaving only a 3-4″ gap so that you can turn the apron right side out.  I left the gap on one of the sides of the apron skirt.

Leave 3-4" gap for turning the apron right side out

I used a 3/8″ seam allowance.  **Make sure you keep your ties in towards the centre of your pieces so that you don’t inadvertently sew them into your apron seams.

8.  If you are a beginner sewer, here is a quick tip on sewing 90 degree corners.  Sew straight down the side of the apron.  When your needle is 3/8″ from the bottom of your apron stop sewing.  If your needle is in the up position, turn the wheel on the side of your machine to put the needle in the down position.  Lift up your presser foot and rotate your piece 90 degrees.  Sew straight along the bottom of your apron.  Repeat at next corner to go up the other side.

Presser foot is up, needle is down. Now you can rotate your fabric 90 degrees.

9.  Turn your apron right side out and press your seams flat.

10.  Top stitch around the outside of the apron.  This will close the gap that was left for turning as well as giving it a professional finished look.

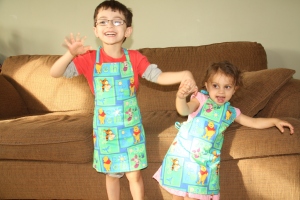
11. Enjoy the finished product!  I was so pleased with the first one, that I decided to make a second one for my son.

I’m still learning about my fancy camera, and I didn’t quite get the settings right for this photo.  The colours are really washed out 😦

Tunnel of Fudge Cake

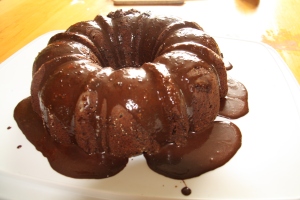
If you have a chocolate lover in your house (as I do!) this cake is a must try.  I stumbled across it in a Best of the Bake-Off Pillsbury cookbook a few years ago.  I made it for my husband’s birthday and he has requested it for every birthday since.  You can find the recipe on the Pillsbury website.  Here is how mine turned out this year:

I also found a cupcake version of this recipe on the net a few years ago.  I can’t find the original site anymore, so I’ll post the recipe here.

Chocolate Fudge Walnut Cupcakes

Preparation:
* 4 (1 ounce) squares semisweet chocolate, chopped
* 1 cup butter
* 1 cup all-purpose flour, sifted
* 1 3/4 cups white sugar
* 4 eggs
* 1 teaspoon vanilla extract
* 2 cups chopped pecans

1. Preheat oven to 325 degrees F (165 degrees C). Line 24 muffin cups with paper liners. In the top of a double boiler, combine chocolate and butter. Heat, stirring occasionally, until mixture is melted and smooth. Remove from heat and allow to cool to lukewarm.
2. Sift flour and sugar together into a large bowl. With mixer on low speed, beat in eggs one at a time. Stir in chocolate mixture, vanilla and pecans. Fill muffin cups 2/3 full.
3. Bake in the preheated oven for 25 minutes. Do not overbake. Tops should be shiny but give slightly when touched.

Easter Cookies

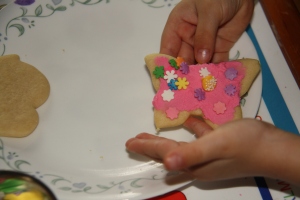
Okay, so here I go with my first real post.  I will warn you right now that this particular activity is not for the faint of heart.  There are several different parts to this that are each fairly time consuming, but the kiddos can help with all of it and it can be lots of fun to do this over a few days.  Also, I did this a few days ago without this blog in mind, so I didn’t take as many pictures of the process as I should have.  Sorry!  Here is a preview of the finished product: Butterly Cookie

Step 1:  Make the cookie dough.  To make the cookies you can use any recipe you like for rolled and cut cookies.  My kids love the one from the Family Fun web site. If you use that recipe, omit the food colouring.  I used a fun set of spring cookie cutters including bunnies, a butterfly, a chick, an Easter egg and a cute umbrella.  The kids and I made the batter on Friday and left it in the fridge overnight.  On Saturday the dough was too stiff to work, so I had to leave it on the counter for about an hour to soften up.

Buttercream Icing

Buttercream Icing

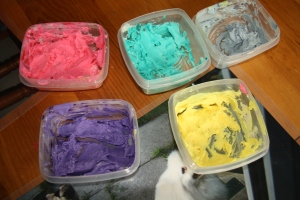
Step 2:  Make the icing.  Again, you can use any icing that your family likes.  This time I used the Wilton buttercream recipe, but I think a nice cream cheese icing would taste really great as well.  We made the icing while we waited for the cookie dough to soften.  The kids helped me make one batch of icing and separate it into five smaller portions.  Then we used Wilton colours to make five different colours of icing.  The kids found this part particularly fun 🙂  All the colours turned out well except for Delphinium Blue, which is the grey mush up in the top right corner.  Maybe if I had added more colouring it would have come out more blue, but as it stands it looks pretty yucky!

cookie decorations

cookie decorations

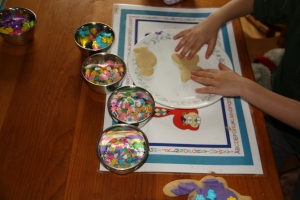
Step 3:  Decorate!  My kids are 2 and 4, so I spread the icing for them.  My 4 year old tried to do his first one by himself, but ended up breaking the cookie.  I took over to save some frustration.  Then they added on the decorations of their choosing.  I gave them each four small bowls of different decorations that I had purchased at the bulk barn.

Step 4:  Enjoy 🙂  The best part is eating the cookies.  I was amazed that my 4 year old diligently decorated six cookies before sampling, but was not surprised that my 2 year old was sampling the candy before she got any onto her first cookie.  All in all a tasty and fun activity that uses up a lot of time for kids who are excited that Easter is coming.

Hello world!

so word press already has Hello world! as the title for my first post.  I’m sure that will bring back memories for anyone who has taken computer programming 101.. Yes Dr. Wortley and Dr. Shukri, I remember my Java 101.

Easter bunny cupcakes

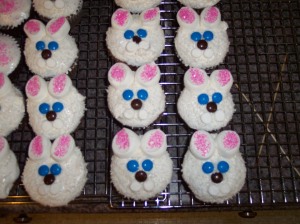
This post is just a test for me to figure out how to add pictures and links into my blog text.  Most of my posts will be related to crafting (like the cute little Easter bunny cupcakes pictured to the right) and not computer programming.